

Streamline tree and shrub care for healthier landscapes
Trees and shrubs are the backbone of any landscape worth loving. They boost property value by 10 to 15%, frame your outdoor space, and create the kind of curb appeal that makes neighbors pause. But when care routines fall apart, those same leafy friends become liabilities: weak growth, disease pressure, and costly emergency work. The good news? A structured, seasonal workflow changes everything. This guide walks you through every key step, from pruning and mulching to watering, fertilization, and integrating biostimulants, so your trees and shrubs can do what they do best: thrive.
Table of Contents
- Tools, materials, and seasonal timing overview
- Step 1: Pruning, mulching, and site preparation
- Step 2: Watering and fertilization best practices
- Step 3: Integrating biostimulants for enhanced growth
- Step 4: Monitoring, troubleshooting, and advanced techniques
- Our perspective: The real-world workflow secrets no one tells you
- Next steps: Solutions for streamlined care
- Frequently asked questions
Key Takeaways
| Point | Details |
|---|---|
| Workflow matters | A stepwise, seasonal approach maximizes tree and shrub health and value. |
| Biostimulants boost results | Applying biostimulants systematically increases root growth and resilience beyond basic care. |
| Adapt to your region | Adjust timing and products to your local climate for best outcomes. |
| When in doubt, consult a pro | Professional help ensures safety and advanced care for large or high-value trees. |
Tools, materials, and seasonal timing overview
Now that you understand the value of a proactive workflow, let’s start with what you need and when. Having the right tools and materials ready before each season saves time, prevents damage, and keeps your plants healthier across the board.
Essential tools for tree and shrub care:
- Hand pruners (bypass style for clean cuts on stems under 3/4 inch)
- Loppers for branches up to 2 inches in diameter
- Pruning saw for larger limbs
- Garden hose with adjustable nozzle or soaker hose
- Mulch fork and wheelbarrow
- Soil moisture meter
- Personal protective equipment: gloves, safety glasses, and sturdy boots
Biostimulants are a key part of your materials list too. The main types include sea kelp extracts, humic and fulvic acids, beneficial mycorrhizal fungi, and amino acid complexes. Each one supports plant health from a different angle, improving nutrient uptake, root development, and stress tolerance. Unlike fertilizers, they work with your plant’s biology rather than simply loading the soil with nutrients.
The workflow follows a seasonal cycle of pruning, mulching, watering, and assessment. Here’s a quick-reference calendar to keep you on track:
| Season | Key tasks |
|---|---|
| Late winter | Dormant pruning, tool sharpening, soil testing |
| Spring | Mulching, fertilizing, first biostimulant application |
| Summer | Deep watering, pest monitoring, spot treatments |
| Fall | Second biostimulant application, debris removal, root zone prep |
Pro Tip: Clean and sharpen all cutting tools before each season. Dull blades crush stems instead of cutting cleanly, which opens the door to disease and slows healing.
Step 1: Pruning, mulching, and site preparation
With the right setup, you’re ready to begin stepwise execution. Pruning is where most gardeners either set their trees up for long-term success or accidentally create problems that take years to fix.
Start with the 4 Ds: remove anything that is dead, diseased, damaged, or deranged (crossing or rubbing branches). Work during the dormant season, ideally late winter before buds break. This timing reduces stress on the plant and limits exposure to pests and pathogens that are active in warmer months.
Here’s a simple pruning sequence to follow:
- Inspect the full canopy before making any cuts
- Remove dead and diseased wood first, cutting back to healthy tissue
- Address damaged or crossing branches next
- Step back and assess the overall structure before any shaping cuts
- Clean tools with a diluted bleach solution between trees to prevent spreading disease
For mulching, apply a 2 to 4 inch layer in a wide ring around the base of each tree or shrub. Keep mulch pulled back a few inches from the trunk. Volcano mounding, where mulch piles up against the bark, traps moisture and invites rot and pest damage. It’s one of the most common and most damaging mistakes in residential landscapes.
Important: Never remove more than 25% of the canopy in a single year. Over-pruning and “topping” trees causes permanent structural weakness and opens large wounds that the tree may never fully seal.
For branch work, keep DIY efforts to branches under 2 inches in diameter. Anything larger, or any work requiring a ladder or chainsaw near power lines, belongs in the hands of a certified arborist. Site clearing rounds out this step: pull competing weeds from the root zone and remove debris that can harbor fungal spores or insects over winter.
Step 2: Watering and fertilization best practices
Once trees and shrubs are structurally sound and ready, keep them robust with proper moisture and nutrition. Watering is where even experienced gardeners make surprisingly costly errors.
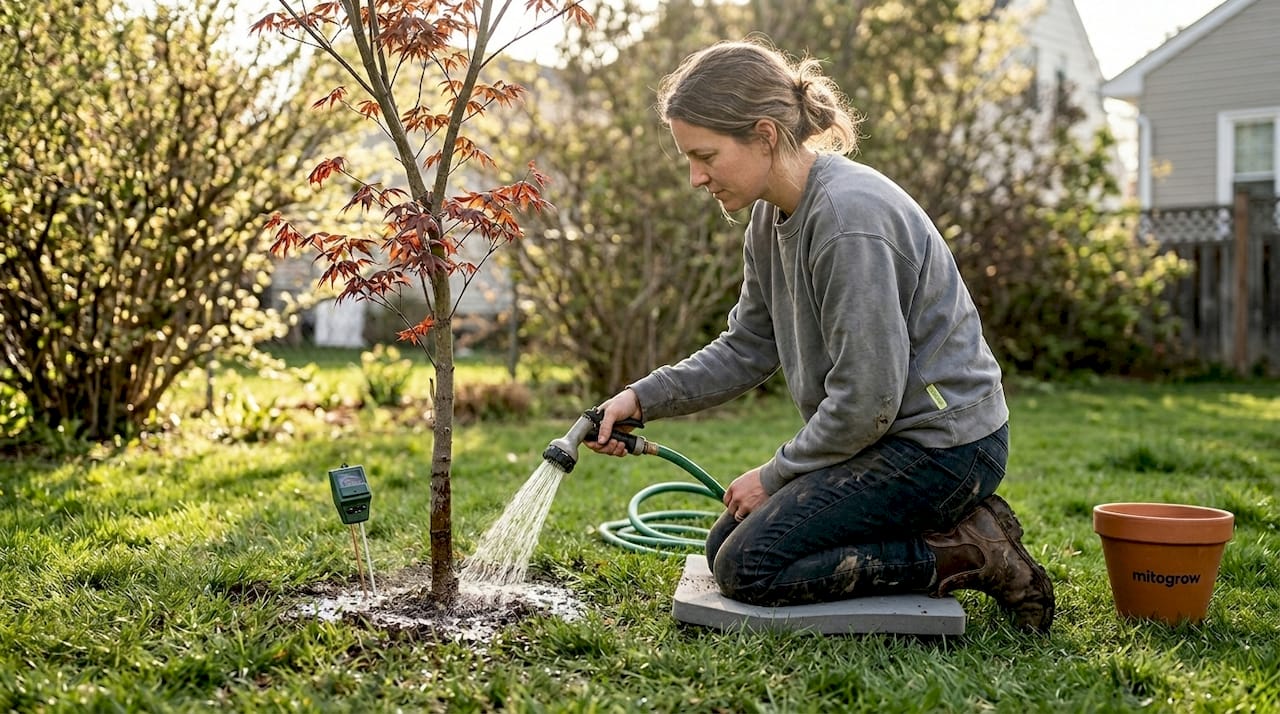
Deep, slow watering is the goal. Frequent shallow watering encourages roots to stay near the surface, making plants vulnerable to heat and drought. Instead, water slowly and deeply once or twice a week, allowing moisture to penetrate 12 to 18 inches into the soil. Soaker hoses and drip systems are ideal for this.
Established trees need 1 inch of water per week, and soil should always be tested before applying any fertilizer. Over-fertilizing is a real risk: too much nitrogen pushes lush, soft growth that attracts pests and weakens structural wood.
| Condition | Watering adjustment |
|---|---|
| Drought or heat wave | Increase to 1.5 to 2 inches per week |
| Rainy season | Reduce or eliminate supplemental watering |
| Newly planted trees | Water every 2 to 3 days for the first month |
| Established trees | 1 inch per week during growing season |
Soil testing reveals pH, nutrient levels, and organic matter content, so you fertilize based on what’s actually missing rather than guessing. Most trees thrive in slightly acidic to neutral soil (pH 6.0 to 7.0). Apply slow-release granular fertilizers in early spring before growth begins.
For larger commercial landscapes, drone irrigation optimization is an emerging tool that maps soil moisture variability across a site and adjusts watering zones automatically, cutting water waste significantly.
Pro Tip: Use a soil moisture meter before every watering session. Stick it 6 to 8 inches into the root zone. If it reads moist, skip the water. Overwatering is just as damaging as drought, and the symptoms often look identical.
Step 3: Integrating biostimulants for enhanced growth
Once core needs are met, take your management to the next level. Biostimulants represent one of the most exciting shifts in modern plant care, and trees and shrubs respond remarkably well to them.
Here’s the key distinction: fertilizers supply nutrients from the outside in. Biostimulants work from the inside out, activating the plant’s own cellular processes so it can absorb and use nutrients more efficiently. Think of it as upgrading the plant’s engine rather than just adding more fuel.
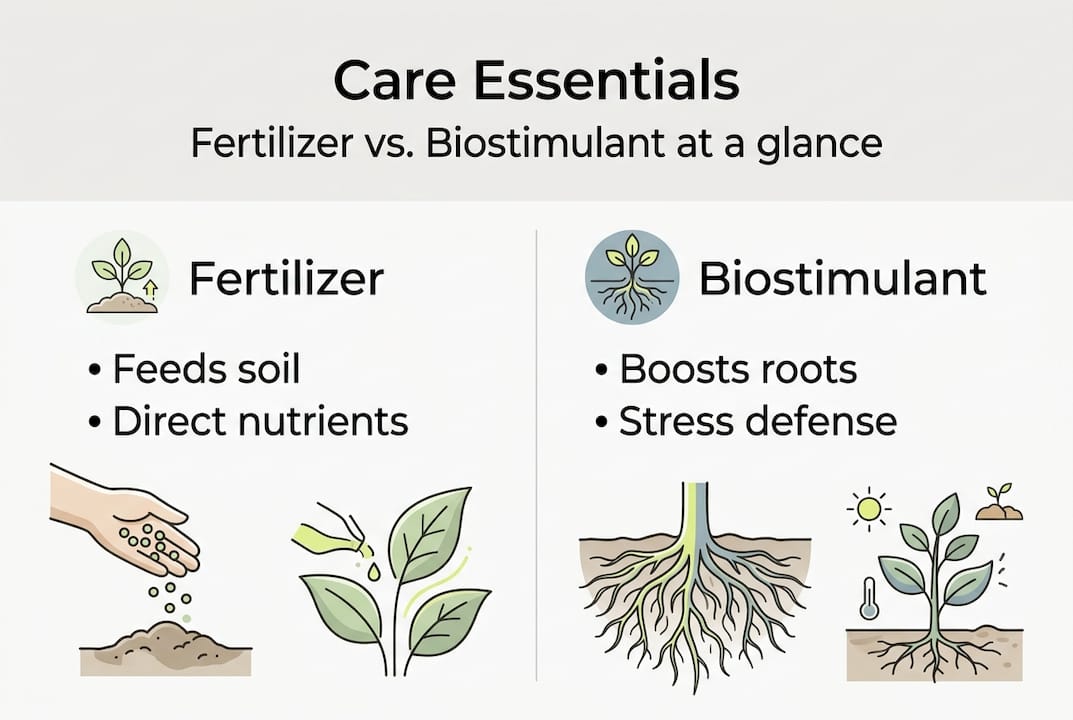
Biostimulants vs. traditional fertilizers:
| Feature | Fertilizer | Biostimulant |
|---|---|---|
| Primary function | Supplies nutrients | Enhances nutrient uptake |
| Risk of overuse | High (burn, runoff) | Very low |
| Effect on roots | Indirect | Direct root mass increase |
| Stress resilience | Minimal | Significant |
Biostimulants applied bi-annually enhance root mass and reduce drought stress, making them especially valuable in urban environments where compacted soils and heat stress are constant challenges.
Here’s how to work biostimulants into your routine:
- Apply the first treatment in early spring as new growth begins
- Use a soil drench method for home gardeners: mix per label and apply directly to the root zone
- For larger trees, focus application at the root flare and drip line
- Apply the second treatment in early fall to support root development before winter
- For trunk injection or deep root feeding, consult a certified arborist
Pro Tip: Biostimulants are especially powerful after stress events like storms, drought, or transplanting. Apply within a week of any major disruption to help your trees bounce back faster.
Step 4: Monitoring, troubleshooting, and advanced techniques
Staying proactive with monitoring and advanced tools preserves your investment. The best tree care programs are built on observation, not just intervention.
Schedule monthly walkthroughs of your landscape. Look for:
- Yellowing or off-color foliage (nutrient deficiency or disease)
- Premature leaf drop or wilting (water stress or root damage)
- Unusual spots, lesions, or cankers on bark or leaves
- Signs of pest activity: holes in bark, sawdust-like frass, webbing
- Soil heaving or mushrooms near the root zone (potential root rot)
“Compartmentalization is the tree’s own defense. Don’t over-treat.” Trees naturally wall off decay and damage through a process called compartmentalization. Excessive wound sealants or unnecessary pruning can actually interfere with this process rather than support it.
Tree growth regulators (TGRs) reduce pruning cycles by 50% and support wound compartmentalization to contain decay, making them a valuable tool for high-maintenance urban trees or properties with large canopy coverage.
Advanced techniques worth knowing about include trunk injection for targeted pesticide or nutrient delivery, TGRs for managing growth in confined spaces, and urban adaptation strategies like structural soil systems for street trees. These are professional-level tools, but knowing they exist helps you have better conversations with your arborist.
To verify your workflow is working, check foliage color and density each season, measure new shoot growth, and assess root zone health by probing soil compaction. Consistent improvement across these three markers means your program is on track.
Our perspective: The real-world workflow secrets no one tells you
Now that you’ve got detailed steps and troubleshooting, here’s what we’ve seen after years in the field. The most undervalued step in any tree care routine is simple, consistent observation. Most expensive problems, from advanced decay to severe pest infestations, start small. Catching them early with a monthly walkthrough costs nothing and saves thousands.
We’ve also noticed that many gardeners and even some landscapers overestimate what fertilizers can do and underestimate the compounding effect of seasonally timed biostimulants, especially on urban or compacted sites where roots are already stressed. A well-fed but poorly supported root system is like a strong athlete with no recovery plan.
The DIY versus professional divide is real, but it doesn’t have to be adversarial. Pros bring diagnostic tools, injection equipment, and site-specific knowledge that most homeowners simply don’t have access to. The smartest approach is collaboration: handle the routine work yourself and bring in a pro for diagnosis and advanced treatments.
The biggest mistake we see? Skipping root care entirely in favor of visible, above-ground fixes. Healthy canopies start underground. Keep a seasonal photo log of your trees and shrubs. You’ll spot trends, catch problems early, and build the kind of intuition that no guide can fully replace.
Next steps: Solutions for streamlined care
Ready to take action with these strategies? Here’s where to get started. Implementing a structured workflow is only half the equation. The other half is using products that actually support your plants at the cellular level, not just on the surface.
mitogrow’s biostimulant solutions are formulated specifically for trees and shrubs, with research-backed results and a formula that’s pet-safe, compatible with any fertilizer, and impossible to overdose. Whether you’re managing a single backyard oak or a full commercial landscape, mitogrow makes it easy to give your plants the cellular support they need to thrive through every season. Visit mitogrow.com to explore the Trees and Shrubs line and sign up for care guides, seasonal tips, and updates from the community.
Frequently asked questions
What is the best time of year to prune my trees and shrubs?
Late winter or early spring pruning is optimal for most trees and shrubs, while they’re still dormant and before new growth begins. This timing minimizes stress and reduces the risk of pest and disease entry through fresh cuts.
How do biostimulants differ from fertilizers in tree care?
Fertilizers supply nutrients directly to the soil, while biostimulants enhance root mass and stress resilience, helping plants absorb and use those nutrients more efficiently. Using both together gives you the most complete approach to tree and shrub health.
Can I use biostimulants for all tree and shrub types?
Most landscape trees and shrubs respond well to biostimulants, but benefits must be tailored to the specific species, soil conditions, and site environment. Always follow label instructions and adjust application rates based on plant size and health status.
Should I hire a professional for all tree care tasks?
DIY works well for watering, mulching, and small branch pruning under 2 inches, but hire a pro for major or high-risk work including large pruning, diagnosis, and biostimulant trunk injections. Collaboration between homeowners and certified arborists produces the best long-term results.